neoTerra
  • Home
  • Blog
  • Woodland Gardens
  • Built-ins and Space Saving Design
  • How-To
  • Contact & Credits

The Star Trek Corridor

8/12/2016

0 Comments

 
TW is a huge Star Trek fan so the lower levels of the house will have a definite Star Trek / Sci-Fi vibe.

In keeping with the Star Trek motif we are calling the levels "decks" like a ship.   In a ship the Main Deck is designated as deck 1 and lower decks are consecutively numbered 2, 3, 4 etc.

So, the main level of the house is Deck 1,  the mid-level of the basement (East) is Deck 2 and the lowest level (West) is "Deck 3".    :-)

The main project we've been working on  over the past few months has been building out Deck 2.


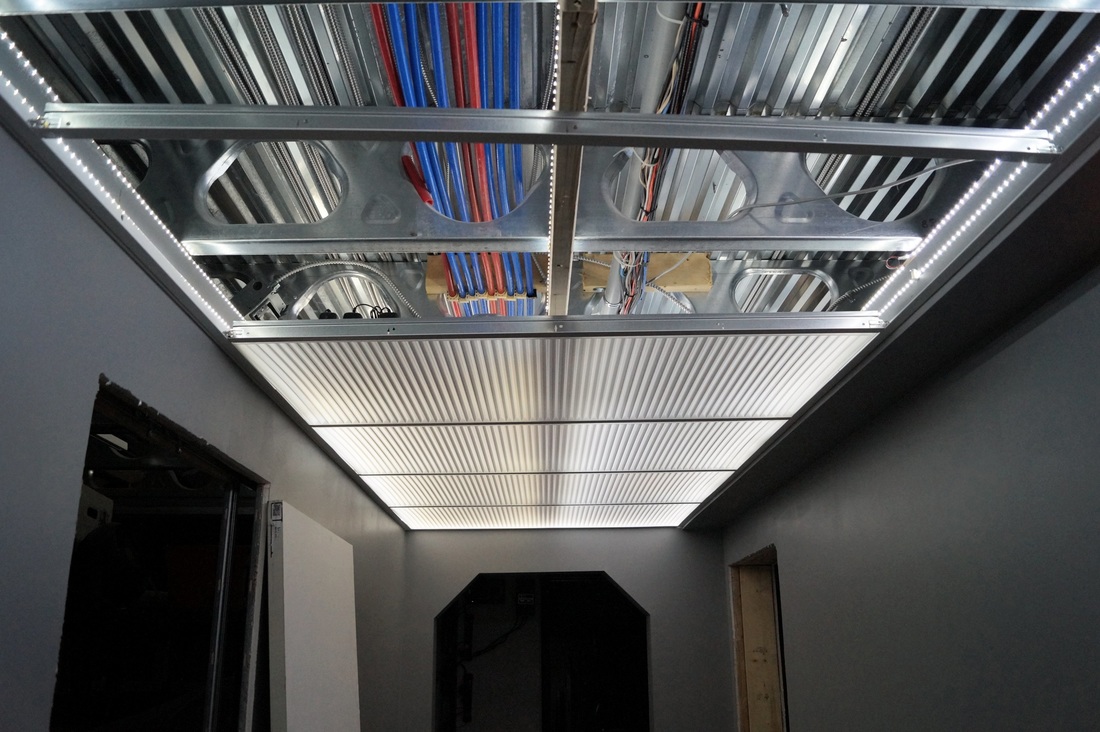
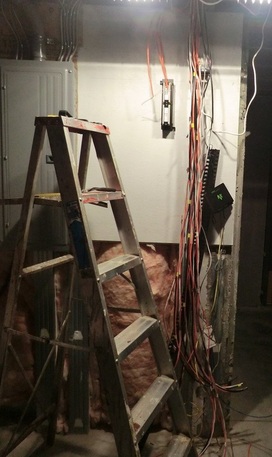
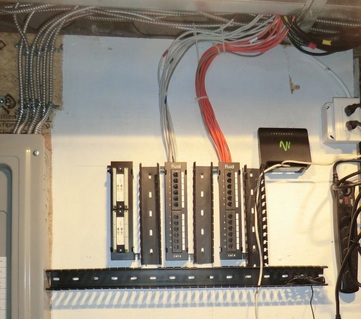
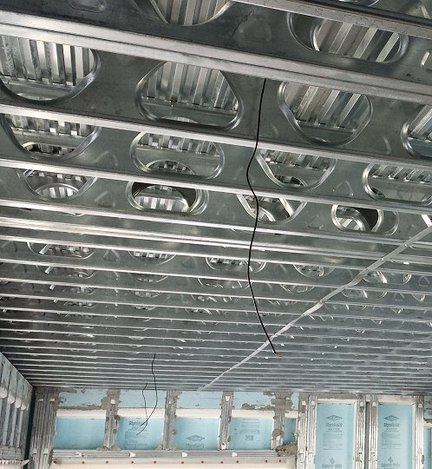
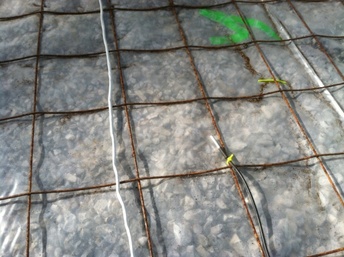
A central feature for this half of the basement is a 20 foot hallway that runs directly beneath the hallway on the main level.

This hallway acts as the "spine" of the house.  The plumbing, electric, Ethernet and coax run through the steel trusses in the ceiling and fan out to the rooms on either side on both levels.

In keeping with our passive solar design, the north side of the corridor is windowless and has two "Cargo Bays" for storage. The south side has Crew Quarters for visiting guests.

The house is built into a ridge so the north side is entirely underground while the south side has windows and a walkout.   Visiting Starfleet dignitaries will have their own private patio!

The picture on the right shows the framing for the two Cargo Bay pocket doors.
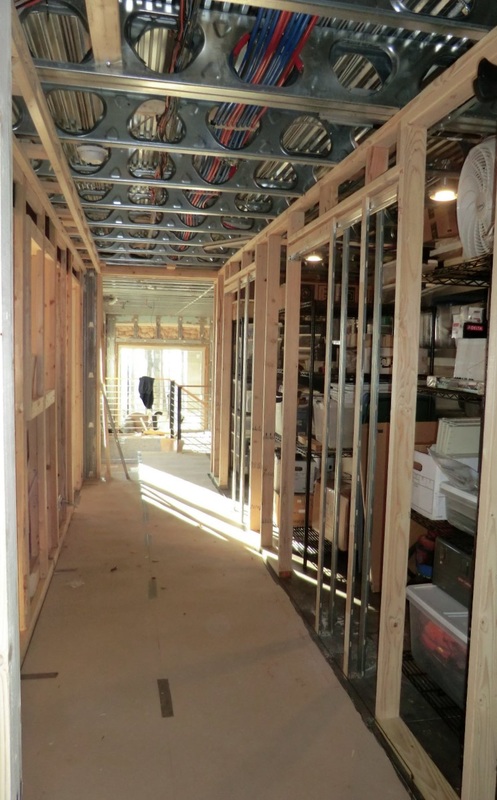


Picture
Fun With LEDs

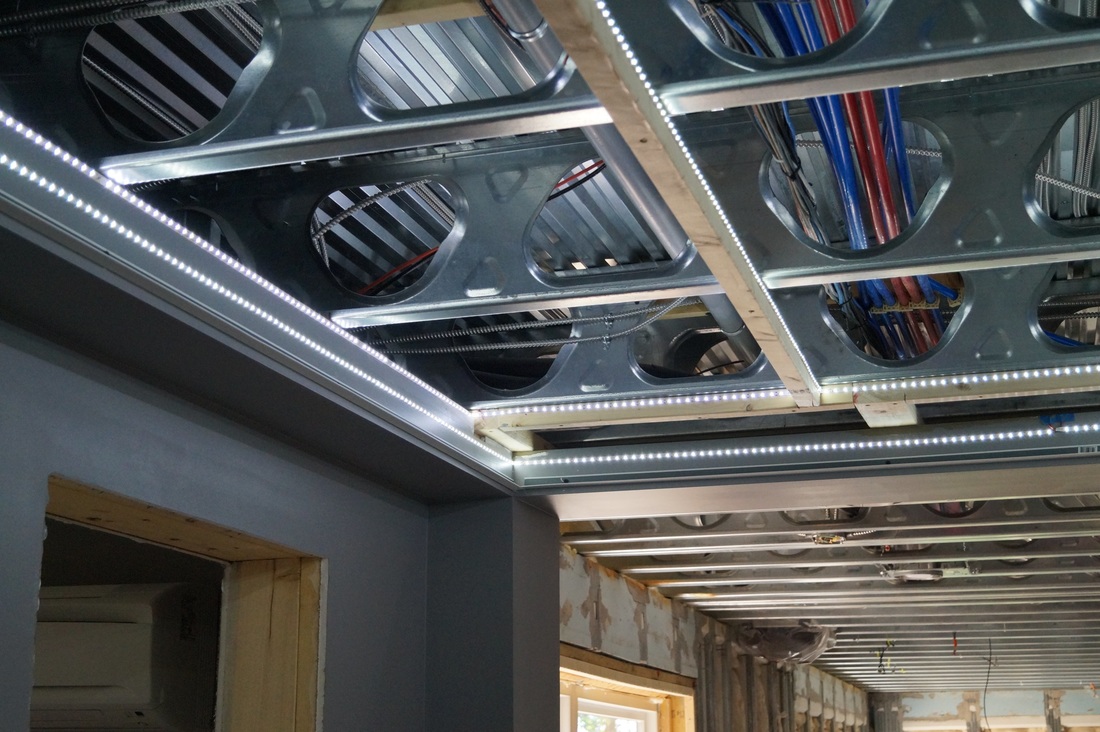
I decided to put a suspended ceiling in the corridor so we will have access to the utilities that run down the 'spine'.  But to stay with the Star Trek theme it had to be something interesting.

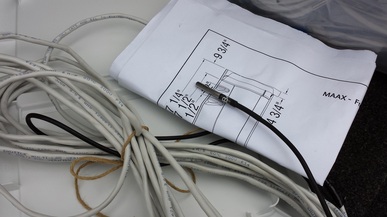
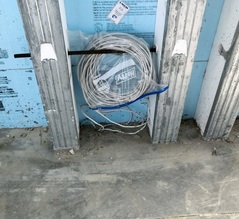
We started by installing about 100 feet of LED strip lights around the perimeter.  The LED strips come in 16 foot rolls with a self-adhesive backing so they are very easy to install.  This is our third project with LED strip lights and we plan to use them much more in the future.

Picture
Picture
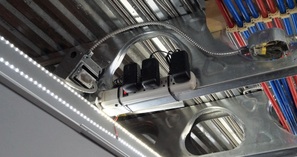
The strips are powered with inexpensive 12V 'bricks'.
Picture

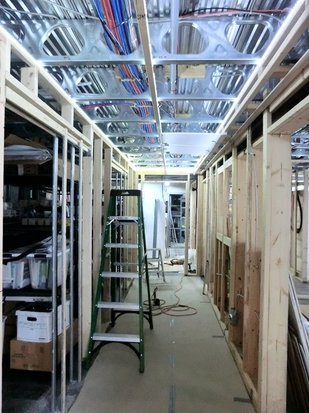
We wanted the ceiling to have a futuristic look and investigated a lot of different suspended ceiling products. We finally decided on translucent  plastic panels from Ceilume.  They come in a variety of different patterns and we selected the simple Polyline for it's classic industrial look.

Picture

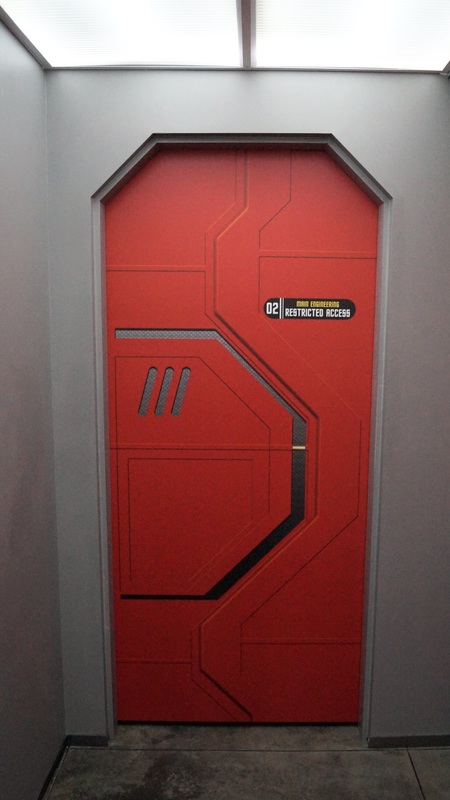
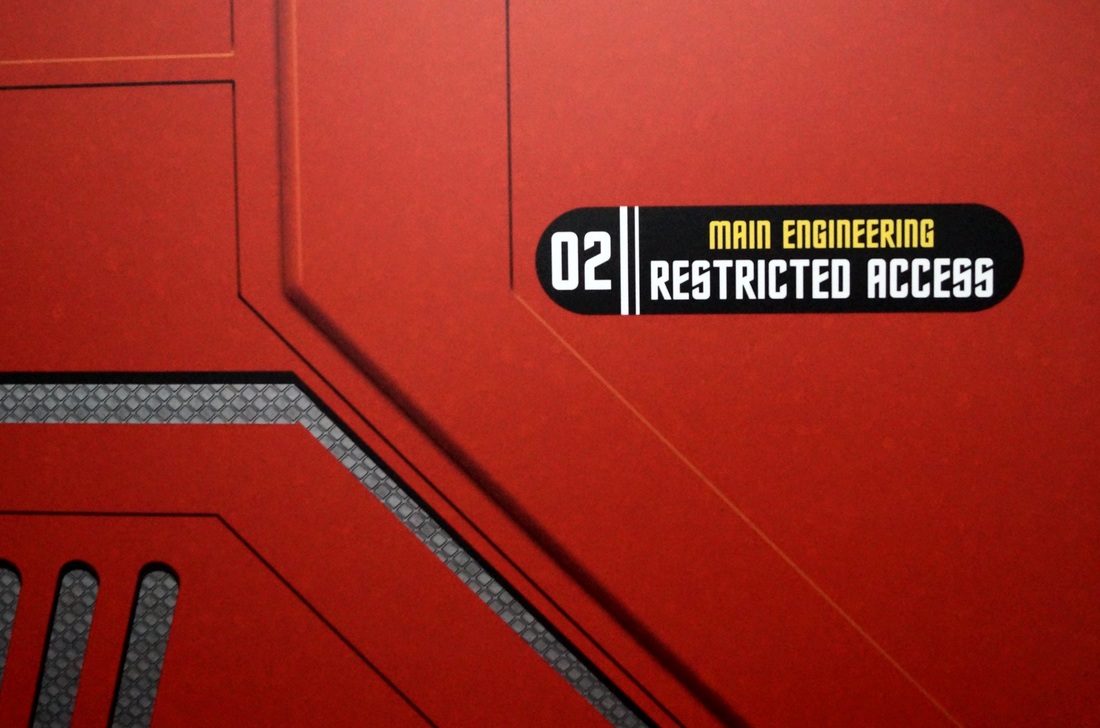
Main Engineering Blast Door

We wanted something really cool as a focal point at the end of the hallway.  TW designed a fantastic graphic for the door and we commissioned RMwraps in Idaho to produce the graphic.  Click on the pictures below to order your own Star Trek door !
Picture
Picture
Picture
0 Comments

Cutting Cable - Part 1

7/25/2015

0 Comments

 
Intro
We don't have any cable TV service on the mountain so we have to look at alternatives.  Two of our primary candidates are Over The Air (OTA) and streaming services such as KODI.

In this post I'll discuss OTA which can deliver the major broadcast networks and some PBS stations.

Picture
To find out what Over The Air (OTA) stations might be within range I used the transmitter locator tool on antennapoint.com (click on the image to go to their site).

They identified 15 transmitters within a 60 mile radius. Most of the stations are directly south in the Atlanta metro area and should be within range with a suitable antenna.

Three stations (Chatsworth, Athens and Toccoa) are far off axis.

Note that each transmitter broadcasts multiple stations so we should be able to get quite a few channels OTA.

Picture
Experiment I - Leaf Indoor Antenna
Picture
For the first experiment we tried the Mohu Leaf 50 amplified indoor antenna.

I selected this antenna based on small size, good reviews and the fact that the amplifier is separate so I could try it with and without the amplifier.

The antenna itself is about the size of a sheet of paper and only 1/4" thick.  This allows us to hang it on the wall with a couple of tacks and try different locations.

Most of the major stations are in Atlanta which is almost directly south. For the initial experiments I just tacked the antenna to a south facing wall near the TV.

Results

The results are both better and worse than I expected.

On the positive side, the indoor Leaf 50 picked up 19 transmitters with a total of 68 channels. This is 5 more transmitters than predicted by the locator tool.  As expected, we are not able to pick up 8 (Athens) which is off-axis and very low power. I'm surprised that we are able to pick up 18 (Chatsworth) and 32 (Toccoa).

In addition, we are picking  up 5 transmitters that were not identified by the tool. These include 4 (very poor signal), 26, 45, 47 and 50. None of these transmitters are significant for us.
  • Virtual channel 26 is a low power station in Atlanta transmitting shopping, Spanish and French channels.
  • Virtual channel 45 is W45DX-D which is a low power station in Atlanta licensed to Home Shopping Network.
  • Virtual channel 47 is also a low power station in Atlanta. It is owned by Korean American TV Broadcasting.
  • Virtual channel 50 is also a low power station located in Atlanta

On the negative side, reception is inconsistent. Sometimes we get 60 (or more) channels and at others we have almost no reception at all.  It does not seem weather related so I must consider the possibility that there's interference from our WiFi or other wireless devices in the house.
0 Comments

Temperature Sensors - Part III

4/13/2015

1 Comment

 
Intro
As mentioned in the first temperature Sensor post (way back in December of 2013) there's a lot of theoretical info on how much heat can be stored in the slab but there isn't very much practical info on how long it takes for the slab to warm up in the sun, how warm does it actually get and how fast does it cool off at night so I wanted a way to measure the temperature of the slab throughout the day.

My brother Phil is an experienced software engineer so he came up with a really cool system that allowed us to embed temperature sensors right in the slabs before they were poured.  We now have the system running and we're starting to collect data. 
Picture
The first step was to get all of the cables terminated.  Internet, phone, sensors....  yikes - that's a lot of cable!


Making progress...
Picture

The Hardware
We use one-wire digital temperature sensors from Dallas Semiconductor.  There are 5 sensors embedded in the basement slab, 11 in the main level slab and 4 in the main level ceilings above the drywall.   I have several spare channels that will be used to monitor outside air temperature as well as inside air temperature on both levels.

An Arduino processor (on the left) retrieves data from the sensors and a small embedded PC (on the right) collects the data and publishes it to web every 15 minutes.
Picture

Results
The planning, modelling and engineering are finally starting to come together.   Now we can monitor the temperatures of both slabs in real time.  Here are the temps right now as I'm writing this post.... How Cool Is That!!
Picture
Picture

The data is stored permanently for graphing and analysis.  The graph for the past eight days clearly shows the difference between cloudy days on the 6th and 7th versus sunny days on the 8th and 9th.  

It's interesting to note that the slab doesn't start to warm up until late afternoon (4:00 - 6:00 PM).  Following a sunny day, the slab will stay above 70 degrees for up to 12 hours.

It's already past the Spring Equinox so our heating season is almost over.  I'm looking forward to seeing how the house performs next Fall and Winter.


1 Comment

Temperature Sensors - Part II

2/2/2014

1 Comment

 
As I mentioned in a previous post, we are embedding temperature sensors in the concrete floors so we can measure the heating from the sun and the effects of thermal mass.   The crew installed 11 sensors in the upper slab before pouring the concrete.  We now have 7 sensors in the basement slab and 11 sensors in the main floor slab.

When the framing is complete we will install additional sensors in the ceilings and roof.
Picture

The first floor sensors go through the metal deck and will get routed through the basement ceilng.
Picture

The basement sensors go through the concrete floor and will be routed up through the basement walls.
Picture
Picture
1 Comment

Temperature Sensors - Science Project

12/20/2013

2 Comments

 
Since neoTerra is a passive solar project we are incorporating thermal mass in the form of concrete slabs in the basement and on the first floor (I'll talk about the construction of the suspended first floor slab in a future post).

There's a lot of theoretical info on how much heat can be stored in the slab but there isn't very much practical info on how long it takes for the slab to warm up in the sun, how warm does it actually get and how fast does it cool off at night so I wanted a way to measure the temperature of the slab throughout the day.

My brother Phil is an experienced software engineer so he came up with a really cool system that allows us to embed temperature sensors right in the slab.  It uses a very small computer called an Arduino and very precise temperature sensors from Dallas Semiconductor.   I'll post details on the project in the How-To section.

Picture
Picture

Picture
The sensors are encased in stainless steel sleeves so we can bury them diretly in the concrete.  We are putting seven sensors in the basement slab. 

Three will get direct sun, three will be in areas that get partial sun and one will be in an area that doesn't get any sun.

We are tying them to the remesh before we pour the slab.

2 Comments

Fun with Fans - Science Project

10/6/2013

0 Comments

 
Picture
You know how the basement always stays nice and cool in the summer.   In our present home there is at least a five degree difference at each level.   The basement will be comfortable at 75 while the second floor is at 85. 

Our open floor plan makes the problem worse.  When we run the air conditioning the second floor cools off.  But as soon as the AC stops, the cold air all settles back down in the basement.

neoTerra will also have an open stairwell. We thought it would be reallly nice if we could circulate that cool basement air up to the main floor, so I did a little science project to test the theory.

For this test, I selected a 340 CFM Panasonic WhisperLine fan.  These are among the quietest and most energy efficient on the market.

Picture
I put the fan on the basement floor and used flexible duct to push the air up the stairwell to the second floor. 

It worked better than expected, though the cleaning lady was a little baffled by the shiny metal tubing running up the hallway!

The 340 CFM fan actually moves too much air for a single room so I'm planning to buy two smaller units for neoTerra.  We will locate them at opposite ends of the house to make the air travel as far as possible to get back down the central stairwell.


Here's a link to the Panasonic web site:
http://www.panasonic.com/business/building-products/ventilation-systems/products/whisper-line.asp


0 Comments

    Archives

    April 2025
    December 2024
    November 2024
    October 2024
    September 2024
    August 2024
    July 2024
    June 2024
    May 2024
    April 2024
    March 2024
    February 2024
    January 2024
    December 2023
    October 2023
    September 2023
    August 2023
    July 2023
    June 2023
    May 2023
    April 2023
    March 2023
    February 2023
    January 2023
    December 2022
    November 2022
    October 2022
    September 2022
    August 2022
    July 2022
    June 2022
    May 2022
    April 2022
    March 2022
    February 2022
    January 2022
    May 2020
    January 2019
    December 2018
    February 2018
    January 2018
    December 2017
    September 2017
    July 2017
    June 2017
    March 2017
    November 2016
    October 2016
    September 2016
    August 2016
    July 2016
    May 2016
    April 2016
    March 2016
    February 2016
    January 2016
    December 2015
    October 2015
    September 2015
    August 2015
    July 2015
    June 2015
    April 2015
    November 2014
    October 2014
    September 2014
    August 2014
    July 2014
    June 2014
    May 2014
    April 2014
    March 2014
    February 2014
    January 2014
    December 2013
    November 2013
    October 2013
    September 2013
    August 2013
    July 2013
    June 2013
    March 2013
    February 2013
    January 2013


    Categories

    All
    2nd Amendment
    3D Printers
    AI
    ANTIFA
    AOC
    Apocoloptimist
    Armor
    Artemis
    Asteroids
    Baseline
    Boogeymen Of Doom
    Canning Cooking
    Canning-cooking
    Climate Hysteria
    Clown World
    Constitution
    Construction
    Cutting Cable
    Deck
    Depopulation
    Don't Panic
    Driveway
    Electrical
    Electric Vehicles
    Elitism
    Elon Musk
    Energy
    Euthanasia
    Fatphobia
    Fearsome Fallout
    Fertilizer
    Firewood
    Flamethrowers
    Front Porch
    Fun Stuff
    Fun With 80/20
    Fun With LEDs
    Future Food
    Gestapo
    Globalism
    Health Care
    Home Automation
    Home Automation
    Ikea
    Insect Farming
    Insulation
    Kamala
    Karma
    Kitchen
    Ministry Of Truth
    Multi Splits
    Multi-splits
    Open Borders
    Pandemic
    Passive Solar
    Photovoltaics
    Plumbing
    Psychology Of Fear
    Random Thoughts
    Rational Prepper
    Scarcity
    Science Projects
    Solar Power
    Spiraling Crime
    Stairs And Railings
    Starlink
    Star Trek
    Steel
    Sunspot Cycles
    Superior Walls
    Suspended Slab
    Sustaining Liberty
    Temperature Sensors
    The Changing World Order
    The End Of Private Property
    The Great Reset
    Ukraine
    Unrivaled
    Urban Exodus
    Victory Gardens
    Waffle House
    WEF
    Widllife
    Winning
    Woodland Gardens


    Follow Me on Pinterest

    RSS Feed